When a paper jam occurs, a warning message appears on the display screen.
|
|
|
|
To avoid tearing the paper, pull the jammed paper out slowly and gently. Follow the instructions in the following sections to clear the jam. |
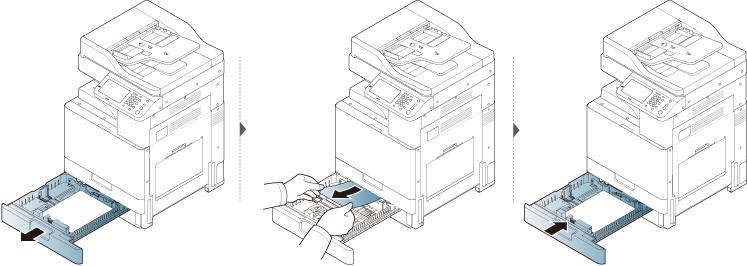
In tray1, 2
|
|
|
|
Illustrations on this user’s guide may differ from your machine depending on its options or models. Check your machine type (see Machine overview). |
If you do not see the paper in this area, stop and go to next step:

If you do not see the paper in this area, stop and go to next step:
In optional trays
|
|
|
|
The procedure is same for all optional trays. |

If you do not see the paper in this area, stop and go to next step:

If you do not see the paper in this area, stop and go to next step:

If you do not see the paper in this area, stop and go to next step:

In the multi-purpose tray

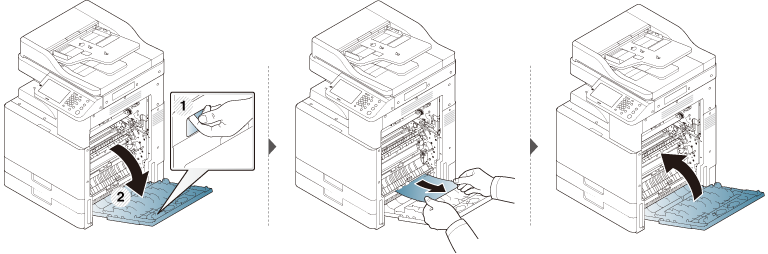
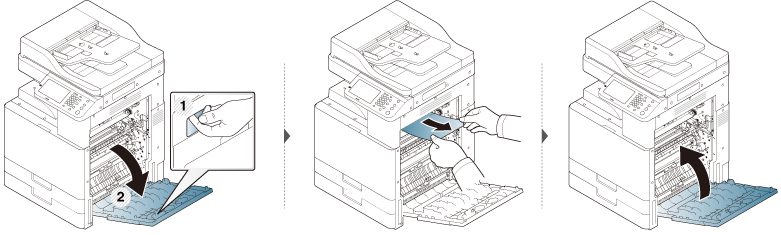
Inside the machine
|
|
|
|
The fuser area is hot. Turn the machine off and let the machine cool before removing paper from the Fuser Unit area. Failure to take care when removing paper from this area may cause injury. |
|
|
|
|
Illustrations on this user’s guide may differ from your machine depending on its options or models. Check your machine type (see Machine overview). |
Jam feed 1, Jam feed 2

Jam feed 3, Jam feed 4 (Optional device only)
Jam registration

Jam at fuser out
|
|
|
|
The fuser area is hot. Take care when removing paper from the machine. |
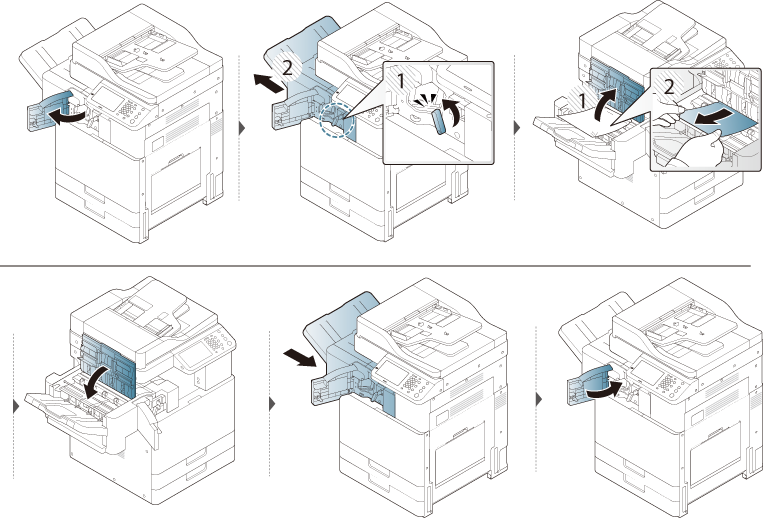
In the exit area
|
|
|
|
The fuser area is hot. Take care when removing paper from the machine. |

If you do not see the paper in this area, stop and go to next step:
|
|
|
|
The fuser area is hot. Take care when removing paper from the machine. |
|
|
|
|
If the optional Finisher is installed, remove the jammed paper as shown below. 
If this paper jam persists, make sure the bin full sensor is unfolded. The bin full sensor is located in front of the output tray. 
|
In the duplex unit area
|
|
|
|
The fuser area is hot. Take care when removing paper from the machine. |
If you do not see the paper in this area, stop and go to next step:

If you do not see the paper in this area, stop and go to next step:

Clearing original document jams
|
|
|
|
To prevent document jams, use the scanner glass for thick, thin or mixed paper originals. |
|
|
|
|
To avoid tearing the document, remove the jammed document slowly and carefully. |
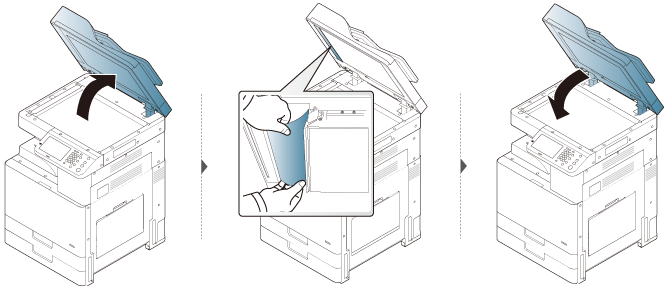
Original paper jam in front of scanner
|
|
|
|

Original paper jam inside of scanner
|
|
|
|

If you do not see the paper in this area, stop and go to next step:

If you do not see the paper in this area, stop and go to next step:
Original paper jam in exit area of scanner
|
|
|
|

In the optional finisher area

If you do not see the paper in this area, stop and go to next step:


If you do not see the paper in this area, stop and go to next step: